Let Customers Add or Change Files After Checkout
Customers don't always have their files ready when they buy. They order the business cards first and send the artwork later, or they notice the wrong file after checkout. File To Inbox gives them a page for exactly that: from the thank-you page, their order page or the order email, they open a page with your store's logo and the items they bought, and add, replace or remove files for each product until you start fulfilling the order.
Don't have File To Inbox yet? Install it from the Shopify App Store →
1 Turn it on for your upload widgets
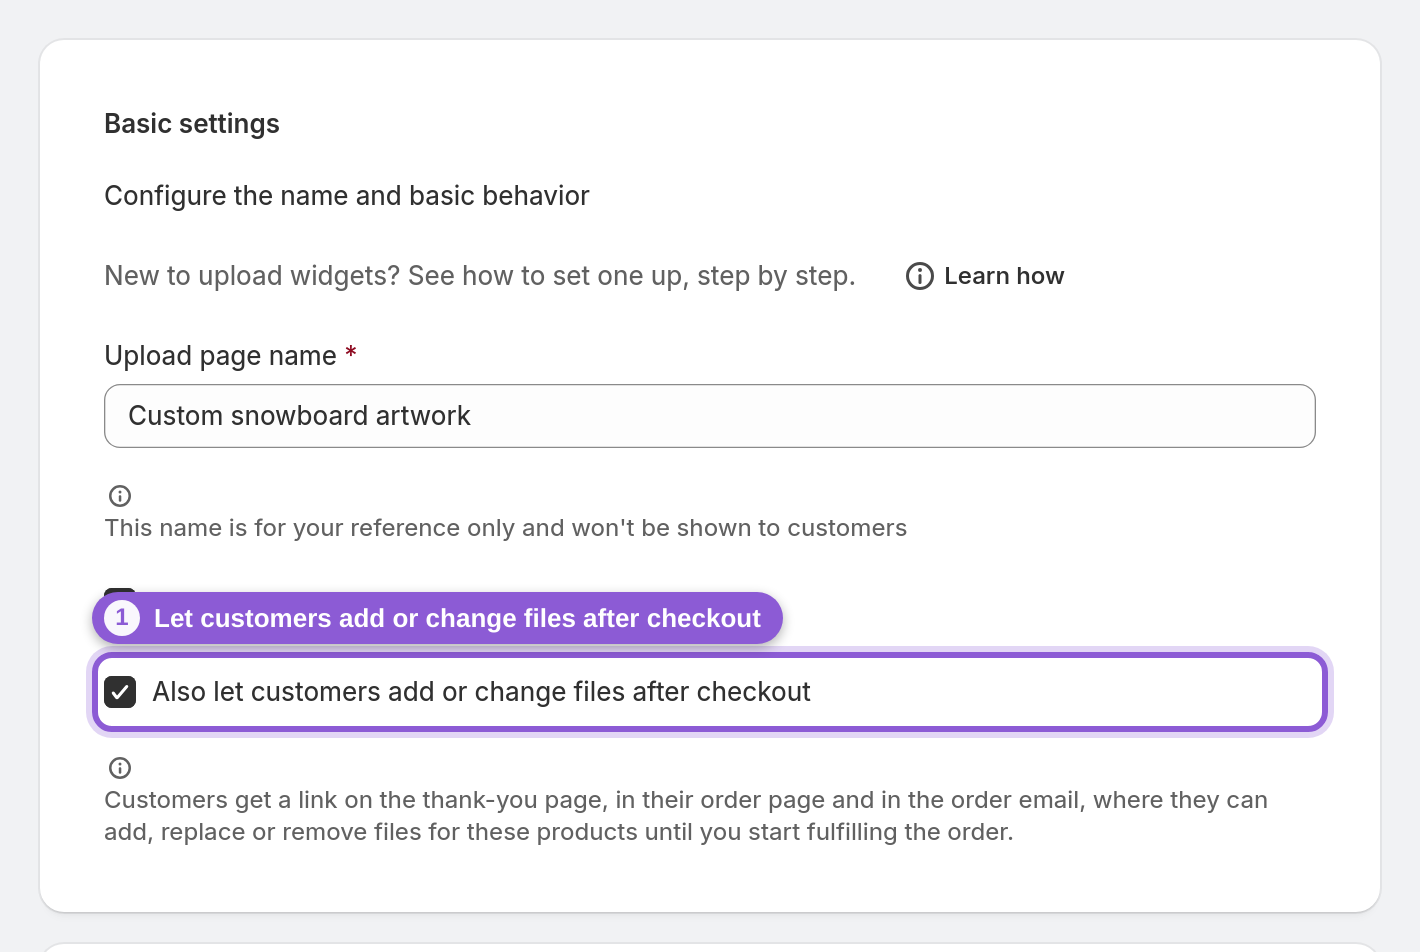
Open the upload widget for the products that need files and tick Also let customers add or change files after checkout. The page uses that widget's settings for each product: its label, whether a file is required, the maximum number of files, the message field and where the files are delivered.
2 Follow the setup page
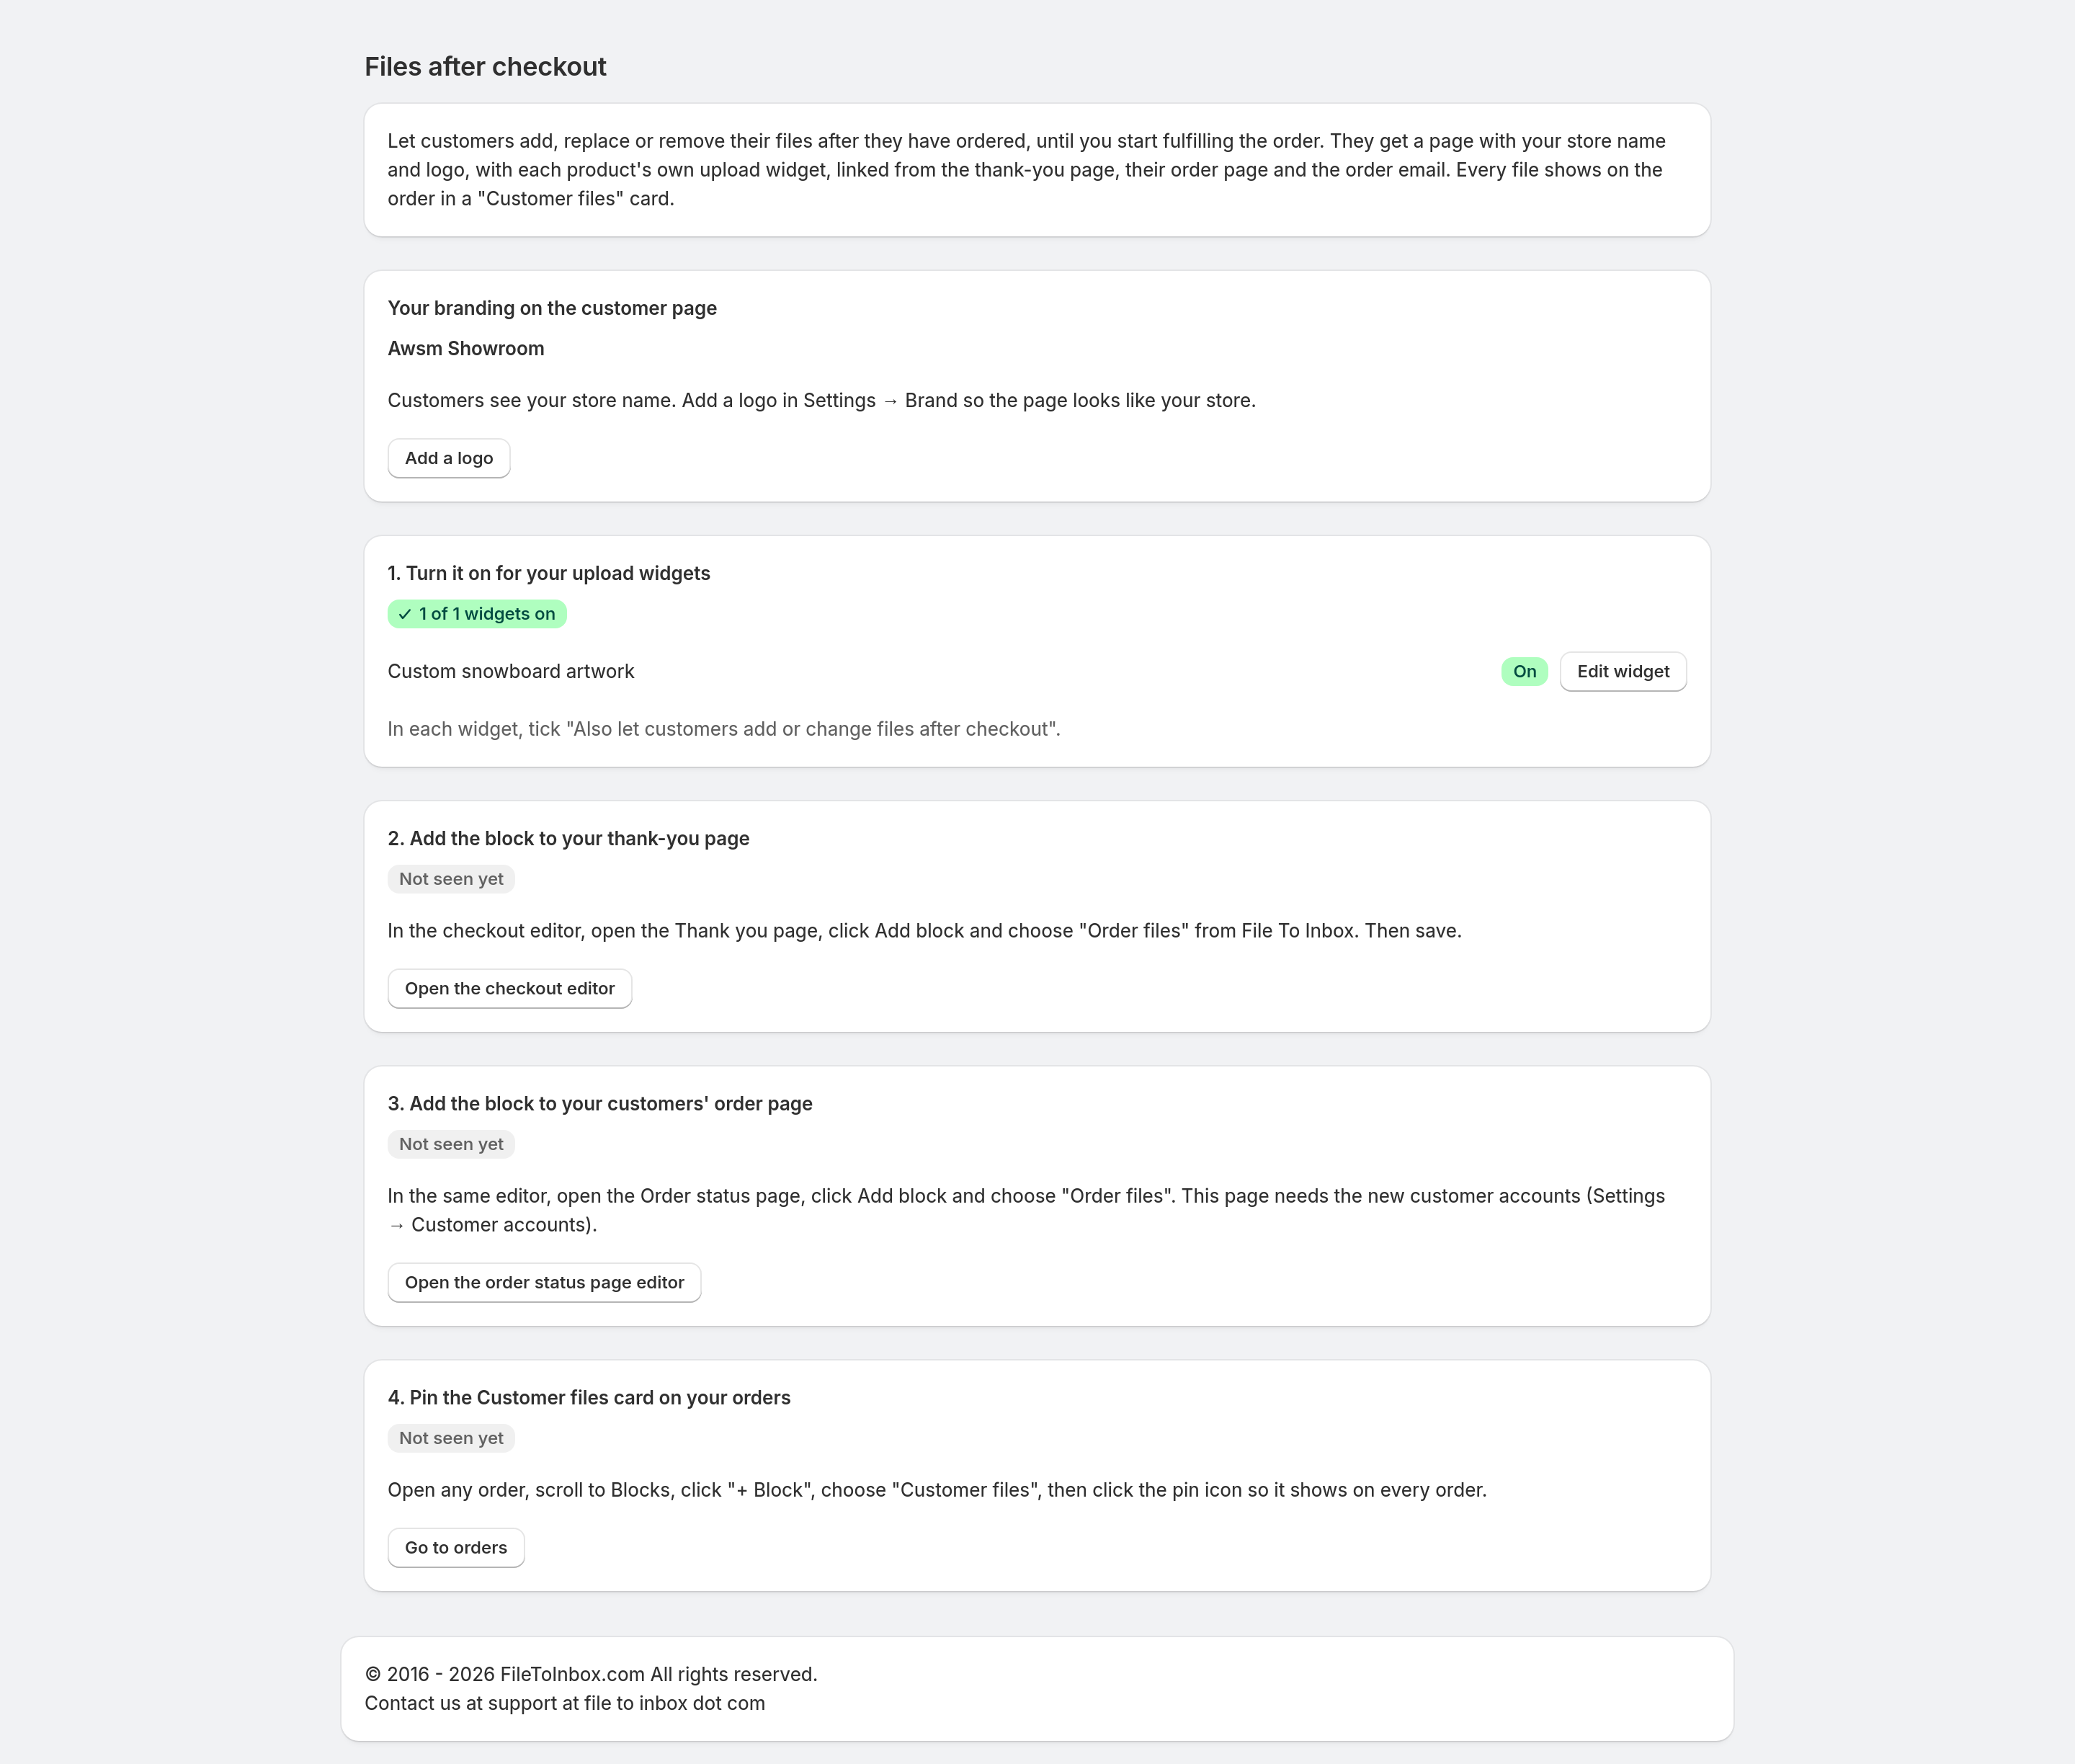
In File To Inbox, open Files after checkout. It shows the store name and logo your customers will see, which of your widgets have the option on, and walks you through the blocks: the Order files block in Shopify's checkout editor, once on the Thank you page and once on the Order status page, and the Customer files card on your orders. Each step shows a check mark once it is live. The order status page needs Shopify's new customer accounts (Settings → Customer accounts).
3 The block on the thank-you page and order page
On the thank-you page and the order page, the Order files block lists each product with its files by name ("Business cards: ✓ 1 file", or "Poster: file needed" when a required file is missing). Customers can click a file to open it. The Upload your files or Add or change files button opens the files page.

4 The files page your customers use
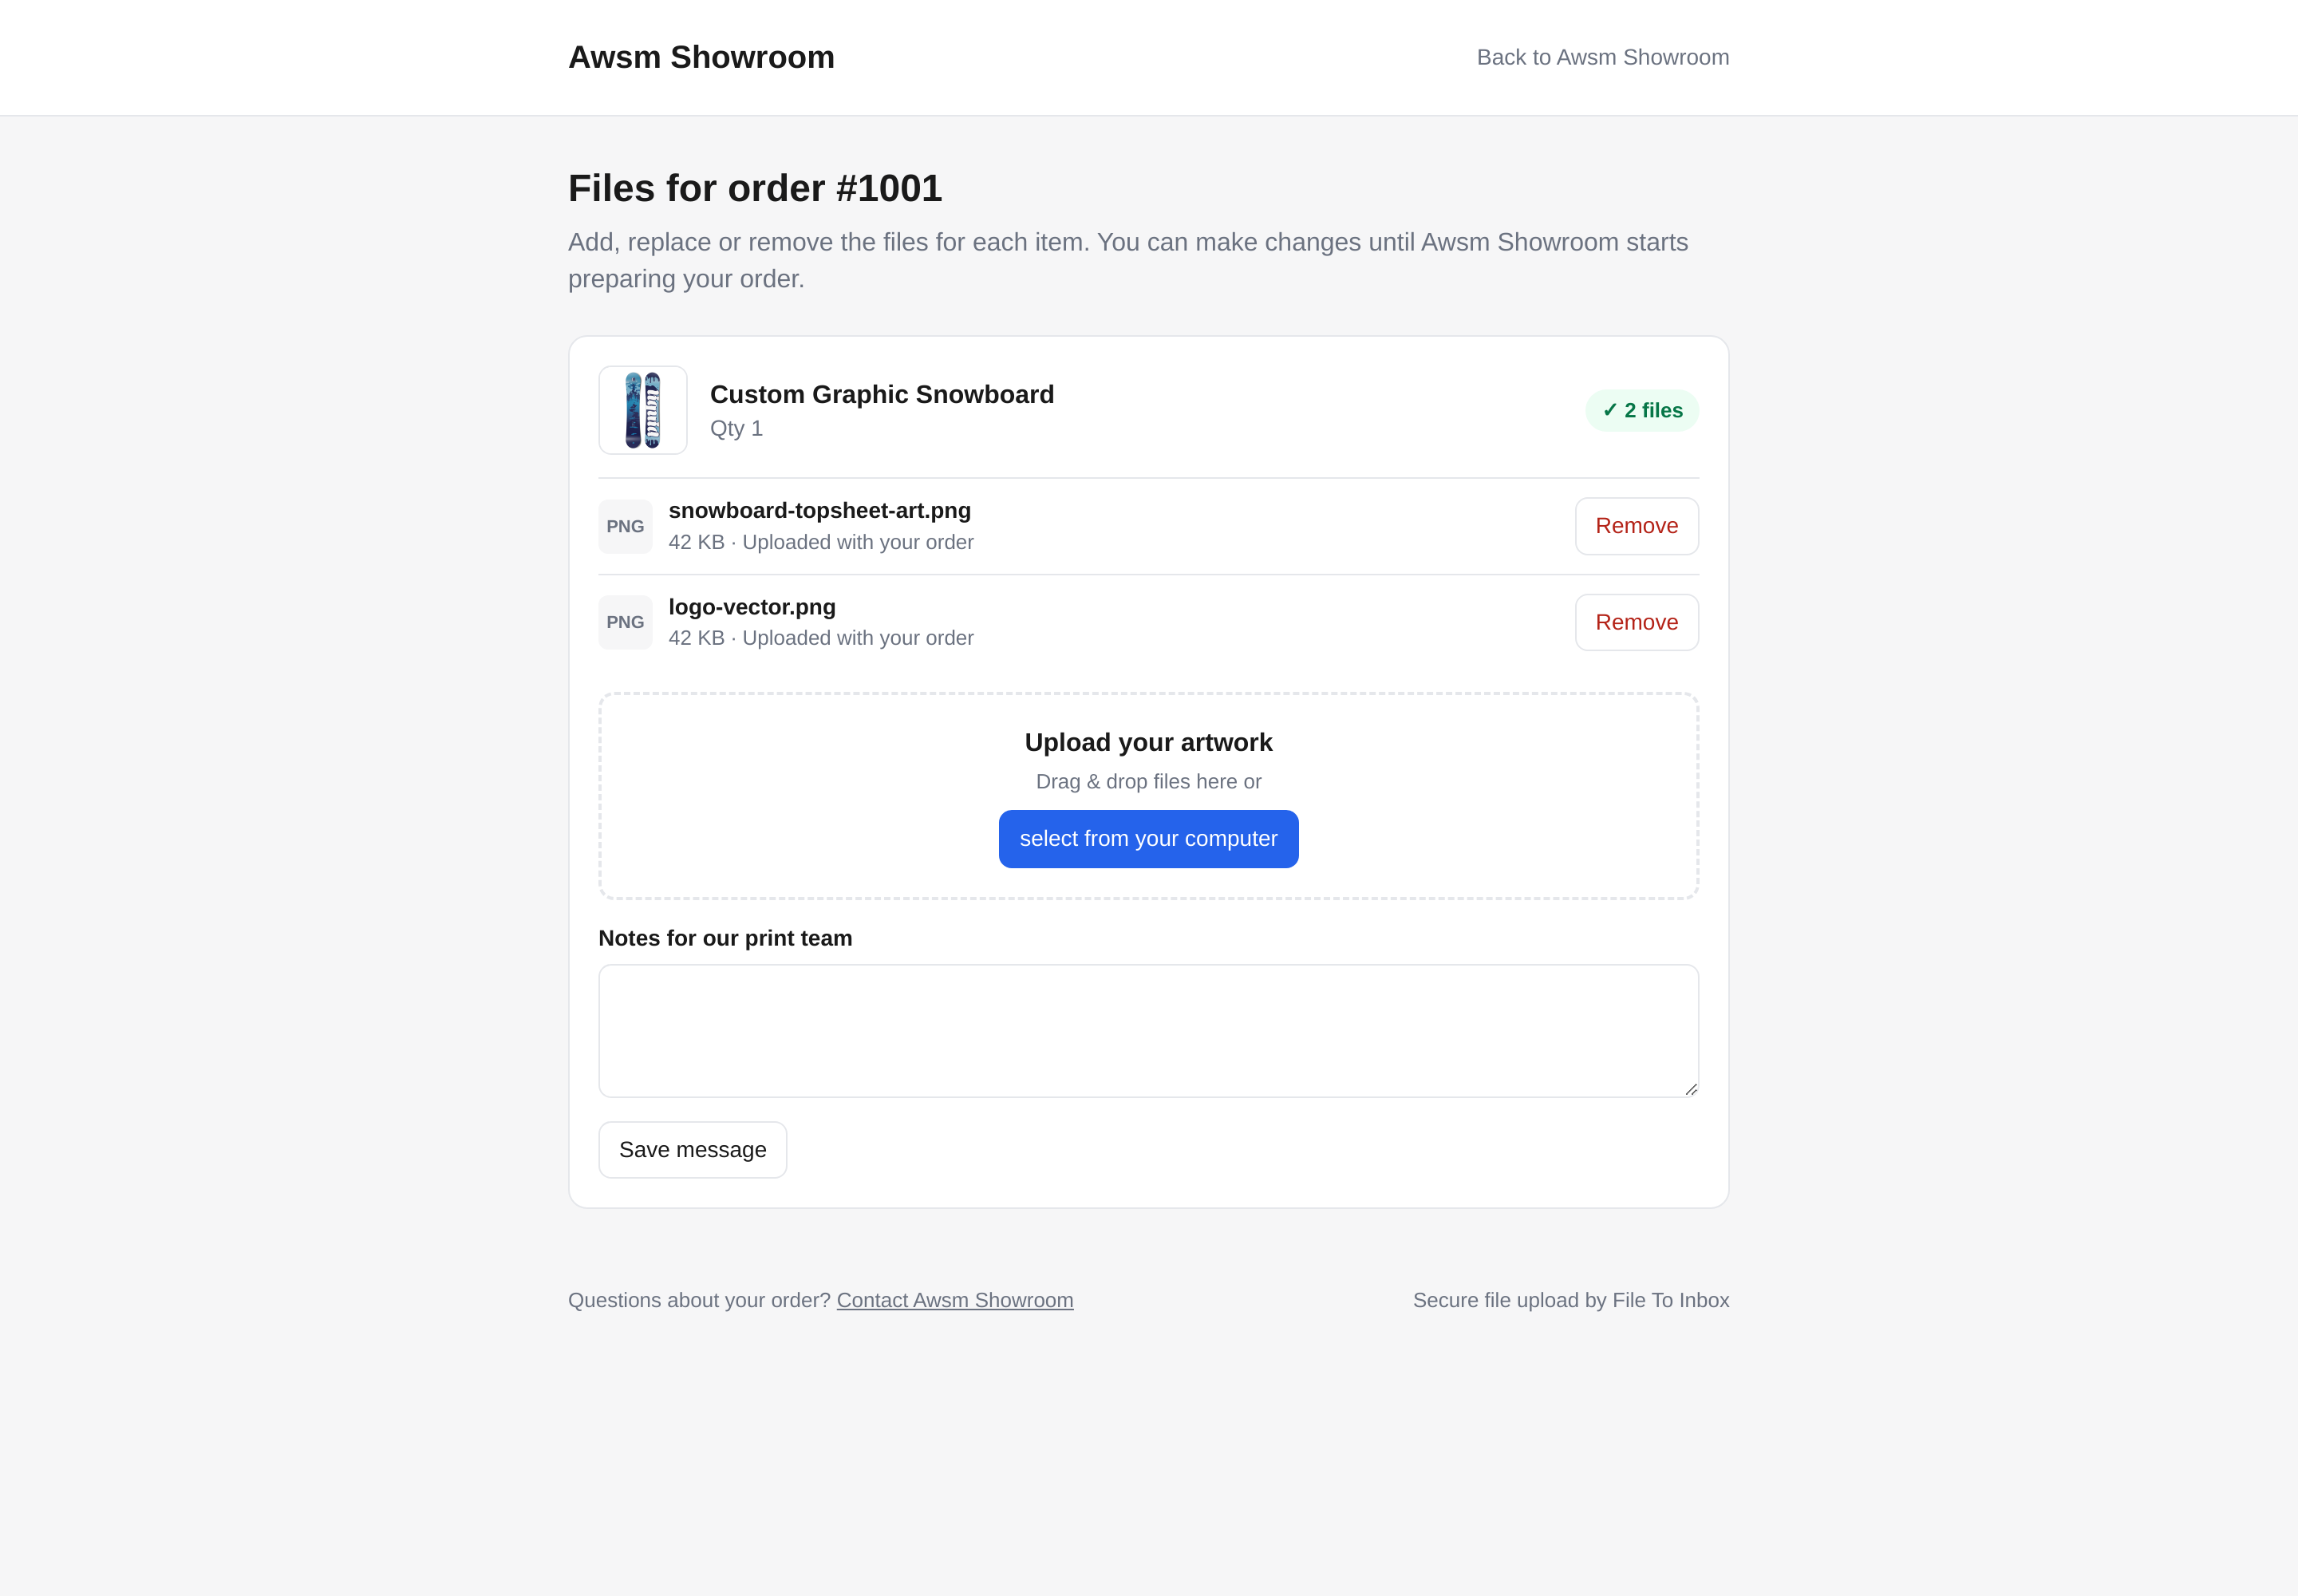
The files page shows your store name and logo (from Settings → Brand; just the name until you add a logo), the order and one card per product with its upload area, the files already uploaded for it (including the ones sent from the product page) and the optional message field. Customers can remove a file and upload a corrected one. Large files, up to 5 GB, upload in chunks with a progress bar.
5 See every file on the order
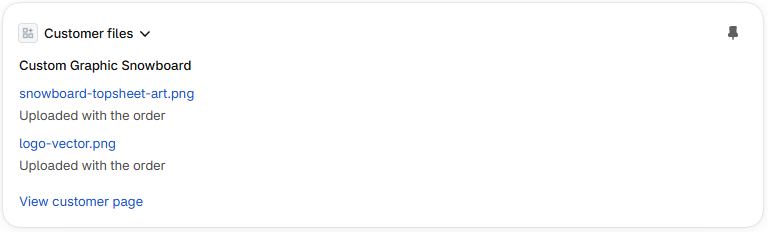
Pin the Customer files card on your order page (open an order, + Block, Customer files, then the pin icon). It lists each product's current files, the customer's message and the files the customer removed, so you always print the latest version. Each file name opens the file wherever it is stored, even if you change your storage settings later. You also get the usual upload email for every file a customer adds after checkout. It names the order (for example Order: #1064, linked to the order in your admin) and shows the product next to each file. Files uploaded on the product page are emailed before the order exists, so their email doesn't name an order; they still show up on the order card and on the customer's files page.
6 Changes stop when you start fulfilling
Once you start fulfilling the order (any item marked as fulfilled or in progress), or the order is cancelled or closed, the page becomes read-only and asks the customer to contact you. Removed files are never deleted: they stay in your storage and on the order card.
7 Add the link to your order confirmation email (optional)
The setup page has a ready-made link for Settings → Notifications → Order confirmation, so customers can come back to their files any time, including stores still on legacy customer accounts.